
What's New?

AI![]() Real Estate Photo Editing
Real Estate Photo Editing
Instant, professional-quality edits powered by AI technology—perfect for tight deadlines.
Read More ↗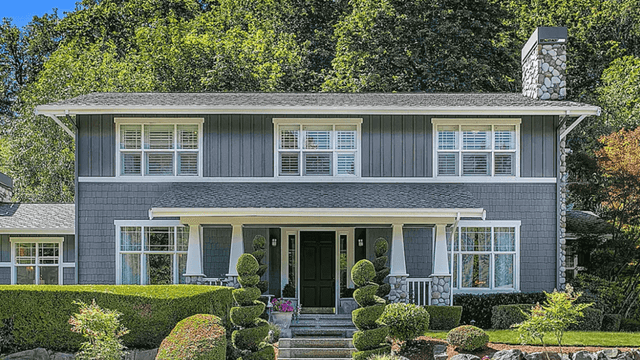
Introduction for Real Estate Photography
Hi my name is Alex and I will be taking you through a photographer training tutorial where you learn the principles and techniques of real estate photography. Make sure you have your camera and tripod on hand so you can change settings accordingly and experiment with some of the techniques intermit...
Camera Settings
Now that you've prepped the house, it's time to set up your camera equipment and make sure your camera settings are dialed in. In no particular order, set your file of numbering settings to continuous so that when you dump your photos onto your computer the files are organized sequentially, and the...
Basics of HDR and Flash
HDR or high dynamic range photography is a popular photographic technique especially for architectural and landscape photographers. HDR photography allows real estate photo editors to fuse different exposures photos of the same scene captured at various shutter speeds and then do a composite ph...
Composition
Developing a technical and intuitive grasp of composition and how do you use the laws of perspective to your advantage is one of the most crucial variables in being successful real estate photographer. Here's a quick breakdown of some of the basic principles you want to be aware of and understand. ...
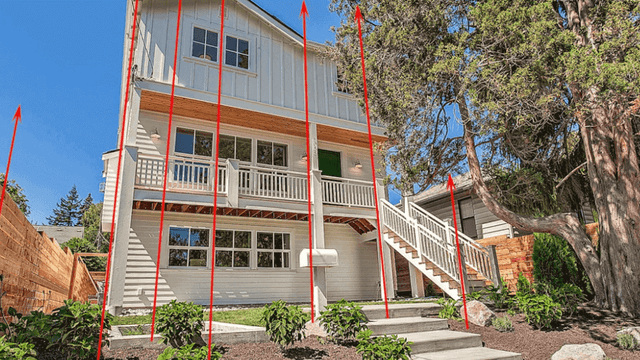
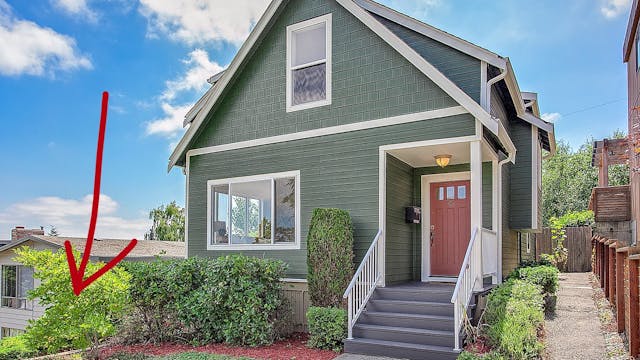
Front Exteriors
Now that we've done over some basic techniques principles and compositional rules of real estate photography, let’s talk about specific types of shots you'll take it nearly every shoot you do and others you'll come across often. The MLS requires the cover photo of every listing be an exterior shot,...
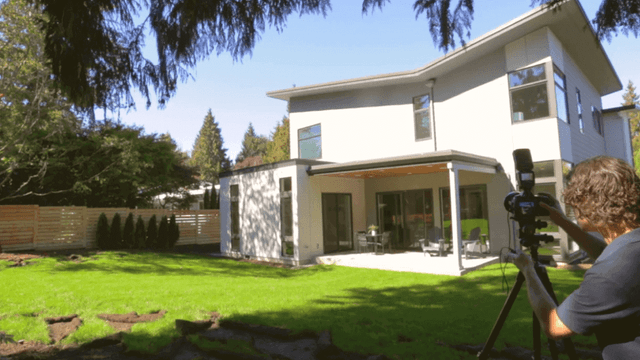
Backyards
Backyard vary quite a bit in layout and landscape design. If a property has a substantial backyard space, it's important to gather at least two or three different angles to exhibit the space from varying viewpoints. One common and effective angle is looking from the house deck or patio area out int...
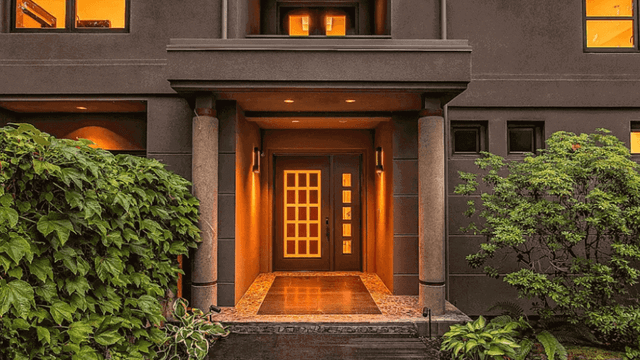
Entryways and Staircases
The entryway is typically only worth capturing if a property has a decorative front door, french doors or a dramatic entryway space. One good way to approach this section of the house is to take a one-point perspective shot with the french door swung open,leading your eye into the entryway spaces. ...
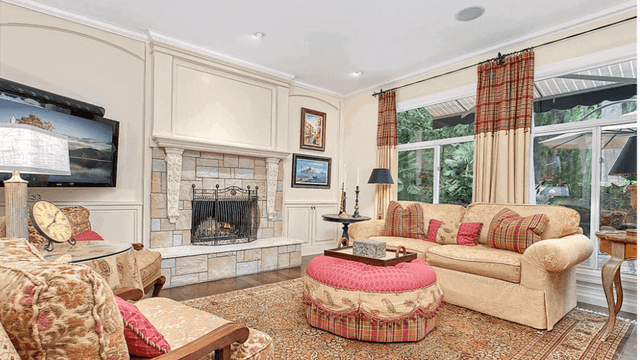
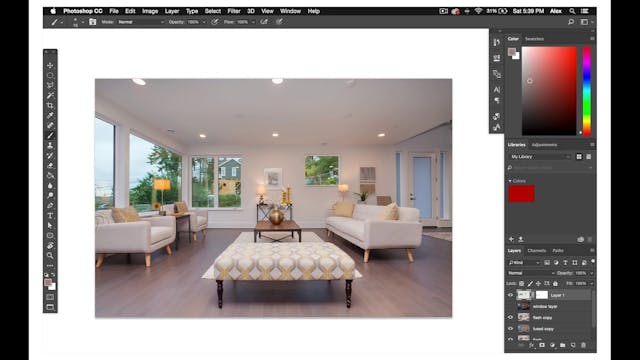
Living Rooms
Living rooms can vary dramatically in scale and layout but here are a few general considerations. Living rooms primarily display best in two point perspective shots, although if the room is extremely orderly and symmetrical, a one-point perspective can be effective. It is ideal to shoot between two...
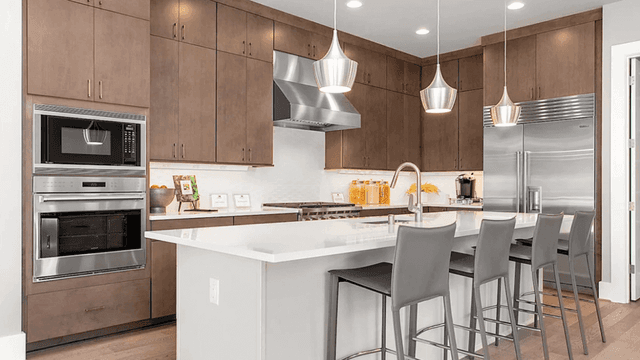
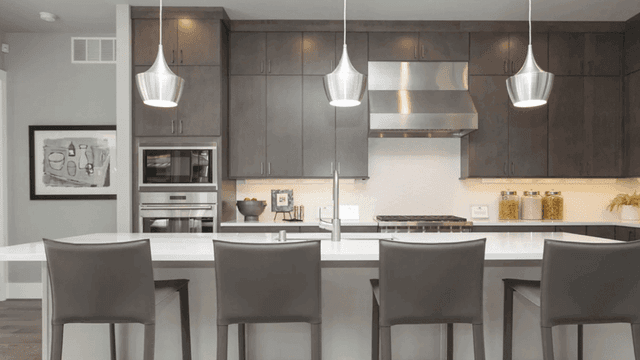
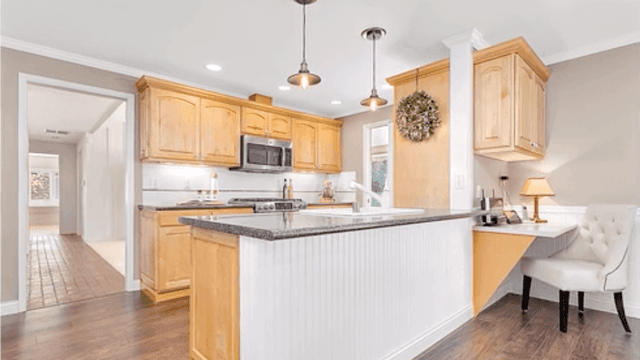
Kitchens
Kitchens are another important feature of the house. The trademark real estate kitchen shot is taken from outside of the kitchen and countertop island looking towards the cabinetry and windows. This is typically a two-point perspective shot but kitchens are where one point perspectives can be very ...
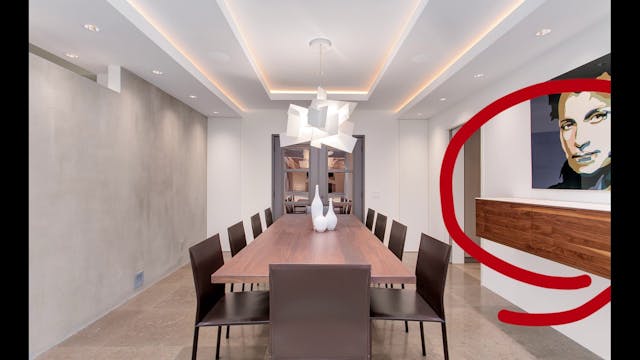
Dining Rooms
Dining rooms are pretty straightforward. Typically they look best from a two point perspective backed up as far as possible and shooting towards the windows. Sometimes the dining room back towards the kitchen with show how they're spatially and functionally related. Be sure to prop the camera up hi...
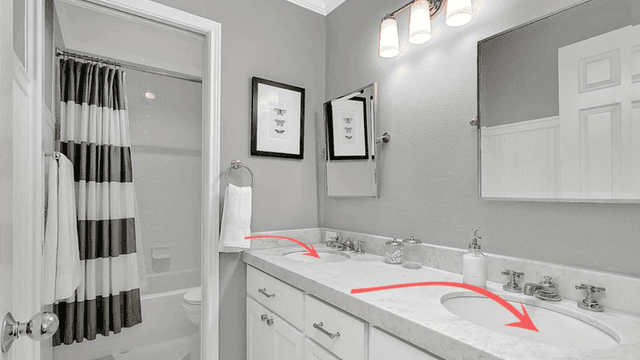
Bathrooms
Most single family homes have a half bath on the first floor of the house and sometimes on the second floor or in the basement as well.At risk of stating the obvious, it is important to focus more on the sink and mirror than the toilet. Oftentimes the toilet will be opposite the sink and won't fit ...
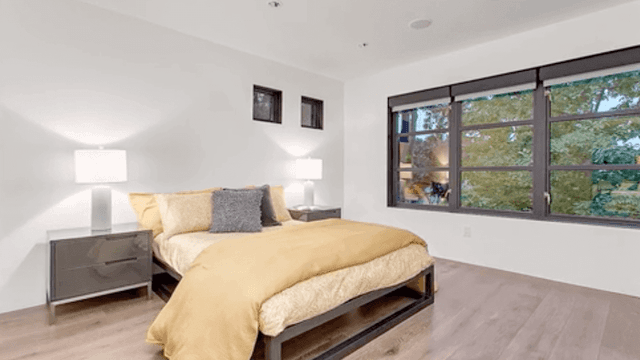
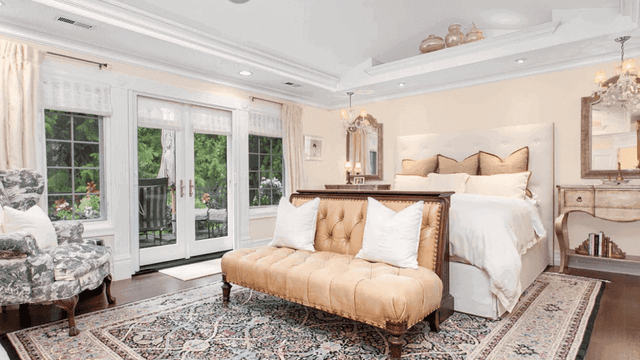
Bedrooms
Bedrooms vary less than many other rooms in how they are designed or organized, thus most bedrooms display best from a two-point perspective looking towards the bed and windows. If necessary back the camera up into the doorway and zoom in to frame the space excluding the third wall. There's also a ...

Twilights
The last specific shot type we will cover are twilight shots. Agents oftentimes like to include a couple exterior photos taken during dust because the warm orange glow of the properties lights complement romantically the deep blue of the properties ambient lighting. Usually you will shoot the regul...

Agent Review Process and Conclusion
Once you finish capturing all the angles of a particular listing, your last obligation on site is to do a review of the photos with the agent. This process is crucial in avoiding unhappy clients. Not only does it give them a chance to edit out superfluous photos they don't like or need, it also al...
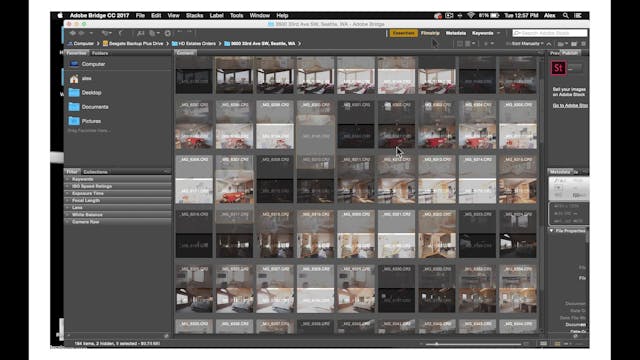
How to master the basics of Adobe Bridge for Real Esta...
In the next few tutorials, I will discuss programs outside a Photoshop that you will use to organize and edit your photos. The first program is Adobe Bridge , Bridge, like Finder on the Mac is a browser software, unlike Finder though, it's compatible with and communicates well with other Adobe pro...
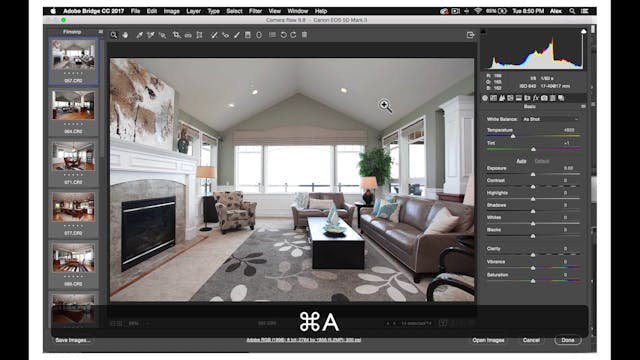
How to master the basics of Camera Raw for Real Estate
For all of your orders, you will go through a pre-production editing process that will help you stay organized as you work on your orders. First, you will create four folders within your main order folder, title these folders Color Corrected, Raw, Fuse, and Flash. Put all of the raw files in the Ra...
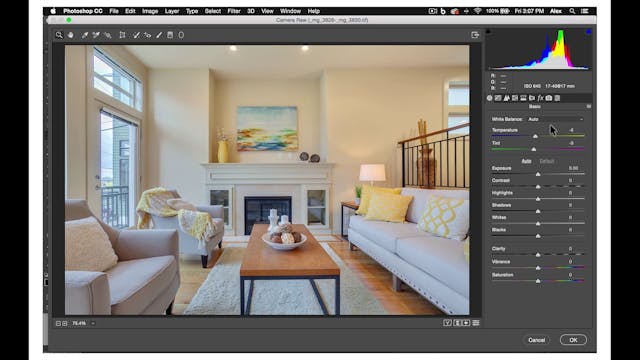
How to master Flambient Flash Blending for Real Estate
The standard real estate photo editing process is almost the same as the HD natural real estate photo editor process except you don't composite any of the windows and you don't use the real estate flash photo even if the photographer took some. Let's go through it again just in case, you’ll start b...
How to master removing color casts from real estate ph...
The HD Photography style editing process is a more complex version of the HD Naturals and Standard photo process. For HD photos we will follow the same steps except you also remove color casting on the walls and other services, composite the windows, and in some cases the ceiling, and then remove h...
How to master advanced tools in Photoshop for real est...
The HD Luxury Photography process is exactly the same as the HD Photography process except a little more complex and time-consuming, and there are a couple small differences. It is worth repeating it from the start to finish so you can remember the workflow well. First, import your fuse and flash...
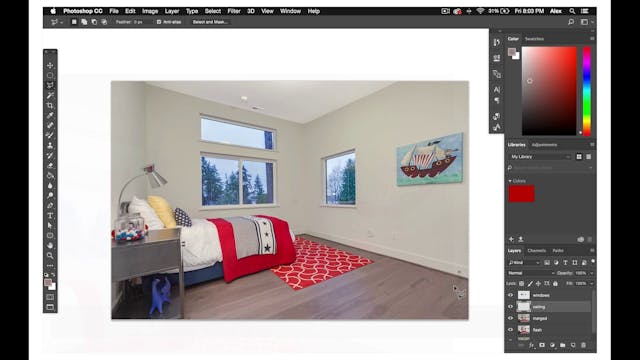
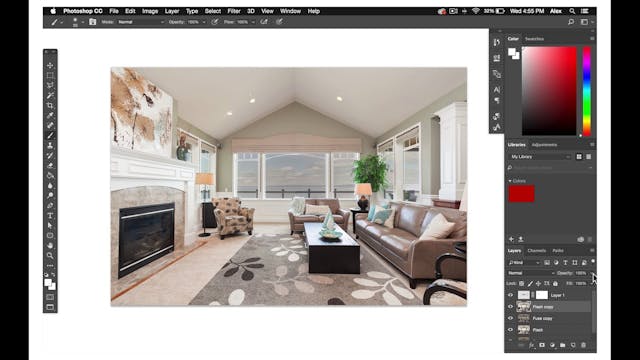
How to master the basics of editing interiors for real...
For our first editor tutorial, we will talk about the basics of a good interior Real Estate Photograph. These are qualities that you will try to achieve in any interior photograph that you're editing. First, your photograph should be well exposed and bright. Nobody likes looking at dark and sad ph...
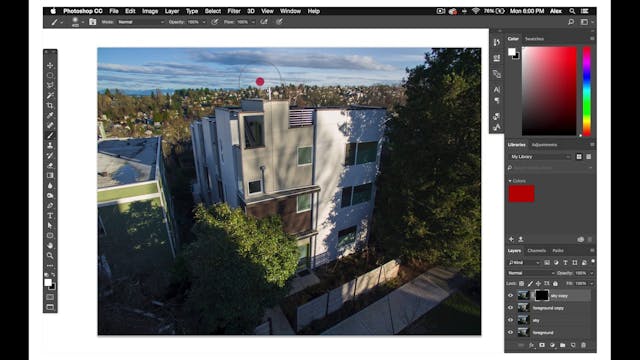
How to master the basics of editing drone photos for r...
Aerial photos are shot from a high viewpoint from a drone. And since the drone is always moving a little bit, the photographer can't take a series of bracketed exposures for HDR fusing like they do from a tripod. So there will only be one raw file for each photo. As a result, the aerial editing...
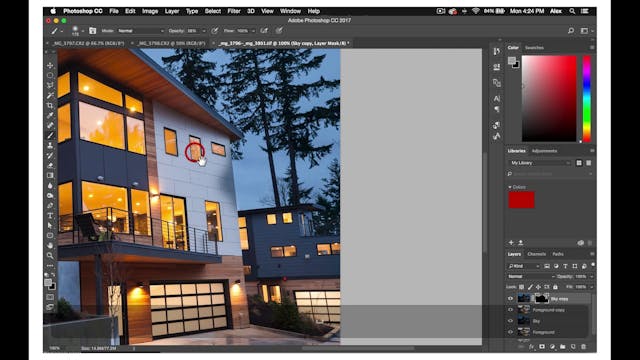
How to master the basics of editing twilights for real...
Twilight shots , which are mainly exterior shots taken right after the sun has set, are really visually appealing because of the deep blues of the sky and the surrounding environment. Which complement well with the glow of the interior lights. The editing process for Twilights is similar to dayti...
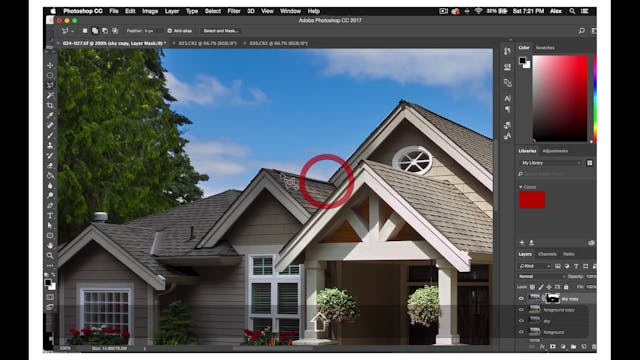
How to master the basics of editing exteriors for real...
We've mainly been talking about interior real estate photos but now we're going to go over how to edit real estate exterior photos . Exterior real estate photos for a number of reasons are much simpler and quicker to edit than real estate interiors and you will edit practically every exterior phot...
The basics of blending flash with fuse for real estate...
So, now that you have all your fused HDR files in the fused folder and your flash files edited in the flash folder. It's time to edit and combine these files in Photoshop. The HD Naturals editing process is simpler than the rest of them. First import your flash Infuse files into Photoshop. Put you...
How to master the basics of real estate exterior editi...
Similar to interiors, exterior photographs will have a lot of stylistic qualities that you will need to achieve and think about while editing every real estate photograph . Firstly, like interiors your photographs should be well exposed both in the foreground and the background of sky. Information...
Send us your photos and let our expert real estate photo editors handle the editing — fast, accurate, and ready for publishing.