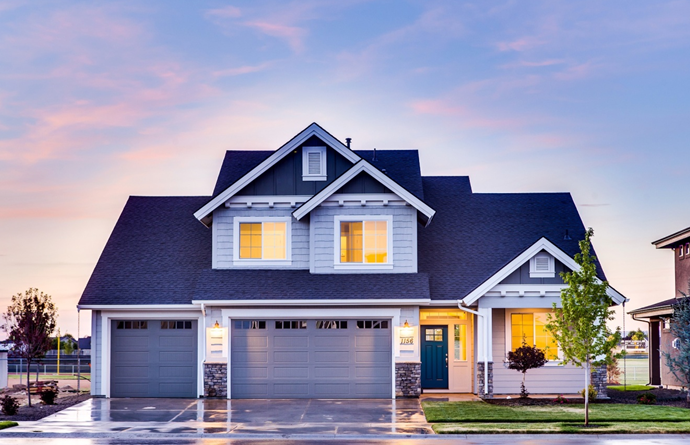
In today’s real estate market, high-quality property photos can make all the difference between a quick sale and a listing that lingers. We often see agents and photographers make critical editing mistakes that diminish the impact of their property images. Understanding these common photo editing errors can help you create more appealing and effective real estate photography that attracts potential buyers.

Many real estate professionals struggle with finding the right balance in their photo editing process. From over-editing that creates unnatural appearances to inconsistent lighting that confuses viewers, these mistakes can significantly impact a property’s marketability. We’ve compiled the top photo editing pitfalls and practical solutions to help you showcase properties in their best light.
1) Neglecting Proper Image Analysis

Before diving into editing, many real estate photographers skip the crucial step of analyzing their images. This oversight can lead to inefficient workflows and subpar results.
A proper image analysis helps identify specific issues that need addressing. We recommend taking time to evaluate each photo for lighting, composition, and potential distractions before touching any editing tools.
Proper image analysis sets the foundation for successful real estate photos. When we examine images thoroughly first, we can create a focused editing plan rather than making random adjustments.
Look for issues with white balance, exposure problems, and perspective distortion during your analysis. These common problems are easier to fix when identified early in the editing process.
We’ve found that spending just 30 seconds analyzing each image can save several minutes of editing time later. This practice also helps maintain consistency across an entire property listing.
Remember to check both technical aspects and aesthetic elements during analysis. Are walls straight? Is the lighting balanced? Does the room feel inviting? Answering these questions before editing makes the entire process more effective.
2) Over-Editing Photographs
Over-editing is one of the most common mistakes in real estate photography. It happens when editors go beyond enhancing the image and start creating an unrealistic representation of the property. Over-editing can lead to misrepresenting the property, creating false expectations for potential buyers.
Signs of over-editing include unnaturally bright skies, excessively saturated colors, and extreme HDR effects that make interiors look artificial. When photos don’t match reality, buyers feel misled when they visit the property in person.
We recommend maintaining a balance between enhancement and authenticity. Real estate photo editing should showcase a property’s best features without crossing into misrepresentation.
Avoid over-saturating colors, which is a particularly common mistake. Vibrant colors may catch attention, but they quickly signal to viewers that the images have been heavily manipulated.
A good rule of thumb is to edit until the property looks its best while still looking like the actual property. This builds trust with potential buyers and maintains your professional reputation.
3) Ignoring Lighting Consistency

Lighting consistency is one of the most crucial aspects of real estate photo editing that many professionals overlook. When photos of the same property have different color temperatures or brightness levels, they create a jarring experience for potential buyers viewing the listing.
We often see this problem when mixing natural and artificial lighting sources without proper correction. Some rooms appear warm and yellow while others look cool and blue, creating a disjointed visual narrative throughout the property.
Poor lighting is frequently cited as one of the top mistakes in real estate photography. Inconsistent lighting can make a property look unprofessional and poorly maintained, even when that’s not the case.
To fix this issue, we recommend adjusting white balance settings across all images to create a cohesive look. Color temperature should remain consistent from room to room unless there’s a specific design reason for variation.
Proper image analysis before editing can help identify lighting inconsistencies. Take time to review all property photos together rather than editing each in isolation.
Professional editing software offers batch processing features that can help maintain consistency across multiple images, saving time while ensuring quality results.
4) Incorrect White Balance
White balance is one of the most critical aspects of real estate photo editing. It affects how colors appear in your photos and can make or break a property’s appeal. When white balance is off, rooms can look yellowish, bluish, or have other unnatural color casts.
Many photographers struggle with incorrect white balance that makes interiors appear too warm or too cool. This distortion can misrepresent the true colors of walls, furniture, and fixtures.
Poor white balance can make a pristine white kitchen look dingy or give a cozy living room an uninviting cold appearance. This issue often occurs when shooting in mixed lighting conditions, such as rooms with both natural and artificial light.
To avoid this mistake, we recommend using a gray card during your shoot for accurate reference in post-processing. Alternatively, you can select the white balance eyedropper tool in your editing software and click on a neutral gray or white area.
For consistent results across a property, batch adjust similar rooms together. Remember that proper white balance ensures colors are accurately represented and reflects the property’s true appearance, which builds trust with potential buyers.
5) Misaligned Verticals and Horizontals

One of the most obvious signs of amateur real estate photography is converging verticals and misaligned horizontals. These distortions create an unprofessional look that can make potential buyers feel disoriented when viewing property images.
When walls appear to be leaning or floors seem tilted, it creates a sense of imbalance that detracts from the property’s aesthetics. This problem is particularly troublesome for real estate photography because the goal is to present a realistic and pleasing view of the space.
We often see this mistake when photographers shoot without a tripod or fail to use a level during setup. Even a slight tilt of the camera can result in noticeable distortions that make rooms look unstable or poorly constructed.
Professional editing software includes tools to correct these issues. We recommend using the transform tools in Lightroom or Photoshop to straighten horizontal lines and fix converging verticals.
For best results, we suggest addressing this issue during the shoot by using a tripod with a level. However, if that’s not possible, professional real estate photo editing can help correct these problems in post-production.
6) Overuse of HDR Techniques
HDR photography can transform real estate images by showing more details in both bright and dark areas. However, many photographers push this technique too far, creating unnatural-looking results that can drive away potential buyers.
Overprocessing is one of the most common mistakes in HDR real estate photography. When colors become too saturated and contrasts too extreme, properties look fake rather than appealing.
We recommend using HDR subtly to enhance images without making them look artificial. The goal is to create a balanced photo that shows the property accurately while highlighting its best features.
Professional real estate photo editing can help eliminate these errors. A good rule is that viewers shouldn’t notice you’ve used HDR—they should just see a beautiful, realistic property.
Many beginners fall into the trap of pushing HDR processing too far, creating unrealistic images. Remember that HDR should enhance reality, not replace it.
When using HDR techniques, we suggest checking your work by comparing it to how the property looks in person. This helps ensure your photos remain truthful representations.
7) Distorting Room Proportions

One of the most problematic editing mistakes in real estate photography is distorting room proportions. Using ultra-wide angle lenses and improper editing can make spaces appear significantly larger than they actually are.
While it might be tempting to make a small bedroom look spacious, distorting room size or layout is misleading to potential buyers. This practice can create unrealistic expectations when people visit the property in person.
We recommend using a moderate wide-angle lens (24-35mm) rather than an extreme one. This helps capture the room while maintaining more accurate proportions.
When editing, be careful with perspective correction tools. While they’re great for fixing vertical lines, overusing them can stretch rooms unnaturally.
Proper real estate photography should accurately represent the property. Professional editors focus on making spaces look their best without changing their fundamental dimensions.
Remember to keep furniture and architectural elements properly sized in your edits. Distorted furniture is often a clear sign of misleading proportions that savvy buyers will notice immediately.
8) Leaving Clutter in Images

One of the most common mistakes in real estate photo editing is failing to remove clutter from images. Homes with visible personal items, excess furniture, or random objects distract potential buyers from seeing the property’s true potential.
Even with the best camera equipment, cluttered photos make spaces look smaller and less appealing. Buyers want to envision themselves in the space, not navigate through someone else’s belongings.
While you can remove some clutter during photo editing, it’s much more effective to declutter before the photoshoot. We recommend asking homeowners to put away personal photos, excess decor, kitchen appliances, and bathroom items.
For items that couldn’t be removed during shooting, professional real estate photo editing can help eliminate distractions. Virtual staging and object removal tools can transform cluttered spaces into clean, inviting rooms.
Remember to check corners and backgrounds for overlooked items like cords, trash bins, or pet supplies. These small details often get missed but can significantly impact the overall impression of a property.
9) Over-Saturating Colors
One of the most common mistakes in real estate photo editing is over-saturating colors. When we’re trying to make a property look vibrant and appealing, it’s tempting to push the color saturation slider too far.
Over-saturation makes a property look unnatural and often unprofessional. Potential buyers can be turned off by photos that don’t represent the true appearance of the home they might visit in person.
This problem is especially noticeable in images of lawns, skies, and interior walls. Grass shouldn’t look neon green, and blue skies shouldn’t appear artificially electric.
We recommend increasing saturation subtly, typically no more than 10-15% above the original image. This enhances colors while maintaining a natural character of the property.
A good rule of thumb is to step away from your edit for a few minutes, then look again with fresh eyes. If the colors jump out as “too much,” they probably are.
Using calibrated monitors and checking your images on different devices can help ensure your saturation levels look appropriate across various screens.
10) Using Low Resolution Files
One of the most common mistakes in real estate photo editing is working with low resolution images. Low resolution files might seem acceptable on a small screen, but they quickly lose quality when enlarged for marketing materials or viewed on larger displays.
We often see real estate professionals trying to enhance photos that were originally captured at a low resolution. Unfortunately, no amount of editing can truly fix a fundamentally low-quality image.
When potential buyers view pixelated, blurry property photos, they may question the professionalism of the listing. This can directly impact their perception of the property’s value and your credibility as an agent.
To avoid this mistake, we recommend always shooting in the highest resolution your camera allows. Professional real estate photo editing works best when starting with high-quality source material.
If you’re receiving images from photographers, ask specifically for high-resolution files. We suggest a minimum resolution of 3000×2000 pixels for property photos that will maintain their quality across various marketing platforms.
Remember that resizing works only in one direction – you can make high-resolution images smaller, but enlarging low-resolution images will only highlight their flaws.
Importance of Quality Real Estate Photos
High-quality real estate photos serve as the first point of contact between potential buyers and properties. According to the National Association of Realtors, 87% of homebuyers find photos to be the most important feature of online listings.
Impact on Property Listings
Quality photos significantly increase a property’s visibility and time-to-sale ratio. Properties with professional photos receive 61% more views online than their counterparts with amateur photography.
Listings with high-quality images typically sell 32% faster than those with poor visuals. This reduction in market time can save sellers thousands in carrying costs and price reductions.
Professional real estate photos also allow for higher listing prices. Homes with quality photography sell for 1-3% more on average, potentially adding thousands to the final sale price.
In today’s digital-first market, captivating images can be the determining factor that draws a potential buyer’s attention to your listing instead of a competitor’s.
Influence on Buyer Perception
First impressions happen quickly, and in real estate, they usually occur online. 61.3% of brokers believe high-quality photography is crucial for selling homes.
Well-edited photos create an emotional connection with potential buyers before they ever step foot in the property. They help buyers visualize themselves living in the space, making them more likely to schedule viewings.
Poor quality images, conversely, can deter buyers regardless of the property’s actual condition. Dark, blurry, or poorly edited photos suggest neglect and lack of attention to detail.
Professional photos also build credibility for agents and sellers. They demonstrate professionalism and care, signaling to buyers that the entire transaction will be handled with similar attention to detail.
Technical Aspects of Photo Editing
Mastering the technical elements of photo editing is crucial for creating compelling real estate images that attract potential buyers. Proper technique ensures properties are shown accurately while still looking their best.
Balancing Exposure and Contrast
Finding the right balance between exposure and contrast can make or break your real estate photos. Overexposed images wash out details, while underexposed photos hide appealing features in shadows.
We recommend starting with basic exposure corrections before adjusting contrast. Aim for well-lit rooms where both window views and interior details are visible. This often requires multiple exposures blended together.
Quick tips for proper exposure:
- Keep highlights under 90% brightness to preserve detail
- Lift shadows to 15-20% minimum for visibility
- Use graduated adjustments for rooms with varying light levels
Many editors make the mistake of creating unrealistic lighting that can disappoint potential buyers during in-person viewings.
Correcting Lens Distortion
Wide-angle lenses are essential for real estate photography but introduce distortion that requires correction. Vertical lines that lean inward or outward create an unprofessional look that can diminish property appeal.
We find that proper lens correction involves:
- Straightening converging vertical lines
- Correcting barrel or pincushion distortion
- Maintaining proper proportions of rooms and features
Most editing software offers automatic lens profiles that correct known distortion patterns for specific camera/lens combinations. For manual corrections, adjust perspective transform tools until vertical lines are truly vertical.
Be careful not to overcorrect distortion, as this can create unnatural stretching at the edges of your image. The goal is natural-looking rooms that match human visual perception.
Frequently Asked Questions

Real estate photo editing can be tricky, but understanding common issues helps create better property images. Here are answers to questions we frequently receive about fixing and avoiding mistakes in real estate photography.
What are the typical editing errors that can diminish the appeal of real estate images?
The most common editing errors include neglecting proper image analysis before editing and over-processing photos until they look artificial. These mistakes can make properties appear unappealing to potential buyers.
We also see many photographers ignoring lighting consistency throughout a property’s image set. This creates a jarring experience when viewers browse through the listing photos.
Other frequent issues include incorrect white balance adjustment, which causes unnatural color casts, and misaligned verticals and horizontals that make rooms look tilted or distorted.
How should one correct overexposed or underexposed property photos?
For overexposed photos, we recommend reducing highlights and adjusting the exposure slider carefully to recover lost details in windows and bright areas. Window masking techniques can help balance interior and exterior brightness.
When fixing underexposed images, increase shadows and exposure gradually to avoid introducing noise. Using adjustment layers or masks helps target specific dark areas without affecting properly exposed parts of the image.
Remember that natural-looking lighting is key. Extreme corrections often result in artificial-looking images that can deter potential buyers.
What is the impact of poor image composition and how can it be avoided?
Poor composition creates a disconnected feeling and fails to showcase the property’s flow and features effectively. This can significantly reduce buyer interest in the property.
To avoid composition problems, we recommend using a tripod at an appropriate height (around eye level) and carefully considering each shot’s framing. Wide-angle lenses should be used carefully to prevent distortions that make spaces look unrealistic.
Professional editing can help correct some composition issues, but starting with well-composed shots makes the editing process much more effective.
Which photo editing techniques should be used sparingly to maintain realism in property listings?
HDR effects and extreme clarity/texture enhancements should be used minimally. Professional real estate photo editing focuses on maintaining a property’s authentic appearance while enhancing its best features.
We recommend using sky replacements and object removal judiciously. These techniques can improve images but should represent the property accurately without misleading potential buyers.
Saturation and vibrance adjustments should be subtle. Overly vibrant colors are among the common mistakes that ruin property photos.
How can real estate photographers ensure accurate color representation in their images?
Using a color checker card during photoshoots provides a reliable reference point for accurate color correction during post-processing. This simple tool helps maintain consistency across all property images.
We recommend calibrating your monitor regularly to ensure what you see while editing matches what others will see online. This prevents unexpected color shifts when images are published.
White balance adjustment should be done carefully, especially with mixed lighting sources. Aim for natural whites and neutrals to give the most accurate representation of wall colors and finishes.
Why is it important to avoid overly staged photos in real estate listings and what’s the alternative?
Overly staged photos can create unrealistic expectations that disappoint buyers during in-person viewings. This leads to wasted time and frustration for all parties involved.
We suggest a balanced approach that enhances the property’s features without misrepresenting reality. Virtual staging can be an effective alternative that shows a property’s potential without permanent physical changes.
Natural-looking edits that maintain the property’s authentic character will attract genuinely interested buyers rather than those who might be disappointed by an overly enhanced representation.
Editor’s note: This post was originally published in August 2018 and has been updated for comprehensiveness.