Phixer
PortfolioAbout Us
Tutorials

Learn how to get the most out of Phixer's editing services.

Blog

Tips, trends, and insights for real estate marketing success.

FAQ

Quick answers to common questions about our services.

Latest Tutorial & Blog

Introduction for Real Estate Photography

Introduction for Real Estate Photography

Hi my name is Alex and I will be taking you through a photographer training tutorial where you learn the principles and techniques of real estate photography. Make sure you have your camera and tripod on hand so you can change settings accordingly and experiment with some of the techniques intermittently as we go through different processes and ideas.<br/><br/><h2>Before we get started on the photography side of the job, we need to do a basic overview of best practices once you arrive at a property.</h2><br/>Firstly, it's important to remember that though there are formulas and rules of real estate photography that you'll be thinking about every shoot, every agent and broker has different preferences and goals, depending on their taste and the distinctive characteristics of the listing. Therefore after you've met the agent and gone through baseline introductions, ask them to give you a tour of the property so they can voice any specific shot ideas,angles are elements of the property they especially want to capture.<br/><br/>This will give you a good sense of their marketing goal and the layout of the house so you can mentally prepare for the forthcoming shoot. Don't hesitate to respectfully raise concerns if agent has a poor shot idea that you know won't work. In these situations you may want to take the shot and show them it's a bad idea rather than trying to describe why. Nonetheless, the ultimate goal is to give the agent what they want, so be compliant and experiment with bizarre ideas if necessary.<br/><br/>Sometimes you may even be surprised. After you've gotten a tour from the agent, start prepping the house for photos. This means turning on all light fixtures and lamps, pulling up blinds and hiding remote controls, Kleenex boxes, sponges and any other items inside that will show poorly in photos and make it difficult on your <a href="https://www.phixer.net/">real estate image retouching company</a>. For staged houses, you probably won't have to move anything out of the way but in properties where the homeowners are still living there, you may have to hide some personal items and declutter a bit. Remember you have a limited amount of time to finish the shoot, so if the house is overly cluttered or unprepared for shooting, ask the agent whether you should reschedule or if they're comfortable shooting the property in its present condition. There's only so much you can do and you're a photographer not a home cleaner/stager.<br/><br/><h2>Do not spend more than 15 minutes prepping the property.</h2><br/>Do what you can within that limit, however moving heavy furniture, decluttering every room, sweeping etc are not your responsibilities. If you have time, avoid including the following items in your shots; bath mats, small carpets or mats on the kitchen floor, modems and bundles of cords, the homeowner's personal photos, toothbrushes, shampoo bottles and personal toiletries in general, trash cans, bedside alarm clocks, home phones, dog beds, litter boxes and anything else that will negatively affect the marketability of the listing. Usually these items can be gently move to the outside of the frame of the photo, then returned once you finish capturing the space. A note on blinds, in general all window blinds should be pulled up there are few exceptions to this rule, so leave the blinds up if;<br/><br/>A. The view outside is really unpleasant, for example there's a dumpster and industrial refinery, a chaotic construction site or anything else that would devalue the listing.<br/><br/>B. If the agent and insists for whatever reason, on leaving them down, you are after all working for them.<br/><br/>And lastly:<br/><br/>C. If the blinds are broken and won't stay level or pull up entirely. Sometimes excessively heavy blinds can be problematic and it's best not to risk pulling them off the wall. Leave the blinds down and twist them open so light can come through the windows. Other notes on prepping the house; make sure you remove security signs from the front yard before taking exterior shots, also hoses should be either coiled or removed from view.<br/><br/>Garage doors should be closed and garbage cans either moved into the garage or out of view. In kitchen's especially, make sure you double check for cabinet under lighting and turn the stove lights on. Dining room and breakfast table chairs should be tucked in even and orderly. Fans, fireplaces, TVs in any other kinetic features of the listing should be turned off. These objects will appear blurry and disorienting once the disparate exposures are fused by your real estate photo retoucher into an HDR composite.

Read More ↗

What's New?

AI Real Estate Photo Editing

AIPhixer AIReal Estate Photo Editing

Instant, professional-quality edits powered by AI technology—perfect for tight deadlines.

Read More ↗
Photo Editing

Professional editing that makes properties shine.

Declutter

Remove unwanted objects for clean, distraction-free images.

Video Editing

Cinematic property tours that captivate and convert buyers.

Virtual Twilight

Convert daytime shots into dramatic dusk photography.

Virtual Staging

Add designer furniture to showcase a property's full potential.

AI Editing New

Lightning-fast edits powered by advanced AI technology.

Lawn Replacement

Transform dull lawns into lush, vibrant green instantly.

AI Website Builder

Build stunning listing websites in minutes, no coding needed.

LoginGet in touch
Phixer

© 2026 Phixer, Inc. All Rights Reserved

Trusted editing partner for real estate professionals since 2009.

Expert editors, proven quality, 24/7 support.

+1 206-934-1858

155 NE 100th St., #309, Seattle WA 98125

support@phixer.net

Community

  • About Us
  • Portfolio
  • Tutorials
  • Blog
  • FAQ

Services

  • Photo Editing
  • Video Editing
  • Virtual Staging
  • Lawn Replacement
  • Declutter
  • Virtual Twilight
  • AI Editing
  • Website Builder

Legal

  • Privacy Policy
  • Terms of Use

Real Estate Photography Tips 2017

September 13, 2017

Real Estate Photography Tips 2017
Real Estate Photography

September 13, 2017

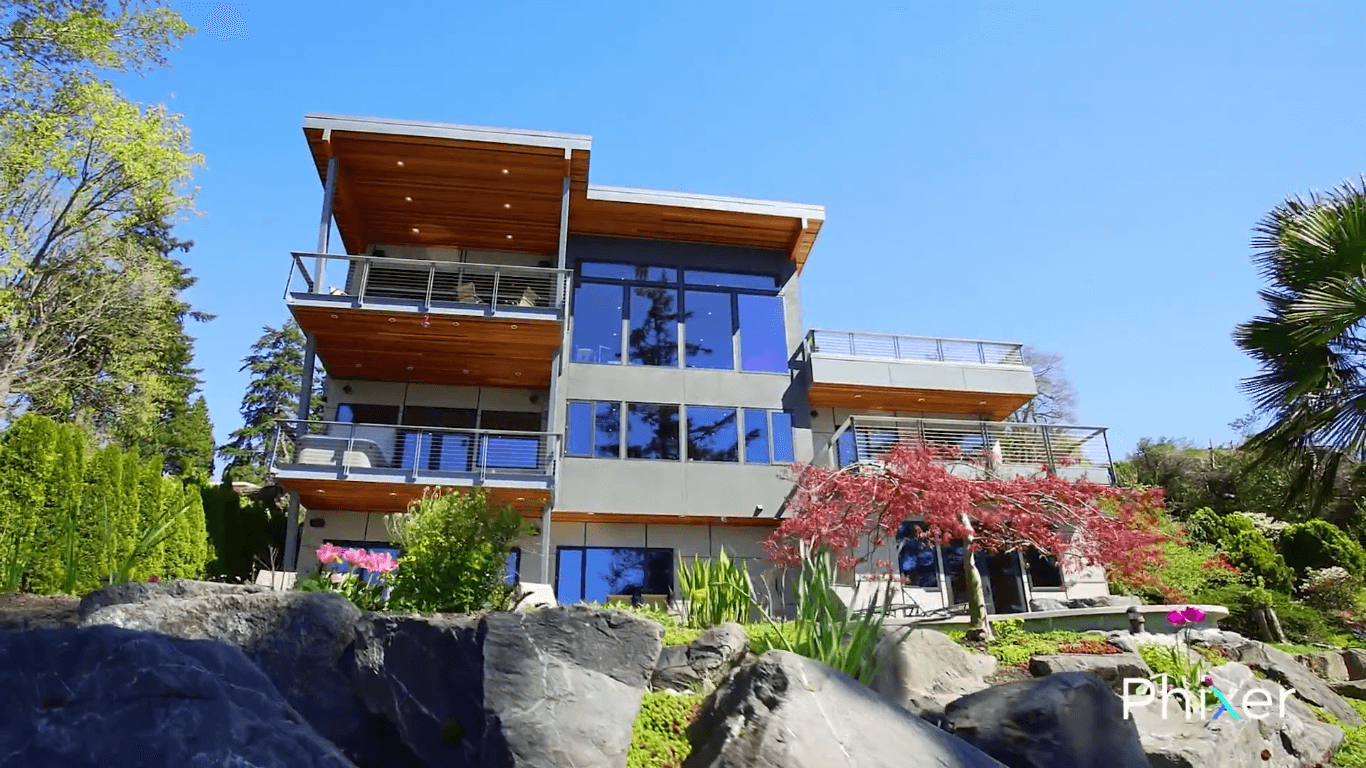
Real estate photography is a good field to start in if you’re looking into photography as a career. It can be a profitable field, especially since online marketing for real estate is growing and people are more and more willing to spend money on great photos. However, there are challenges that come with shooting real estate.We will focus on some tips to that will make a huge difference in the product that you produce for your clients.

If you want to dabble in real estate photography, keep in mind these tips to help you become a success in this field:

• Ready your gear. When you win the business and you’re booked for a shoot, take the time make sure that you have everything that you need. Never wait until the last minute to pack as you might forget the essentials items. A project checklist is highly recommended. Remember to bring extra memory cards and extra batteries since you will be shooting on location. An extra camera body is preferable if your budget allows for it. Double check your gear and ensure that you’ve got most, if not all, of the possible scenarios covered.

• Always use a steady tripod. You can save you and your real estate agent a lot of time and make your clients happy just by having a steady tripod with an adjustable head.  Having to reset your shots can be time-consuming on site and in post-production. Check you tripos to make sure there isn’t an excessive amount of play that can alter the composition of your shots. This will be handy, especially if you will be using HDR for some of your post-production.

• Go wide. A wide-angle zoom lens is indispensable for real estate photography. Make sure you have a good supply of versatile lenses that can do the job for real estate photo shoots.

• Pack more than one flash. When shooting real estate, you need to be ready for whatever the setup is. For shooting smaller rooms, you can get away with just one flash. For large rooms, however, you will need to have extra flash or lights to fill in the shadows. You can also use a reflector or an LED panel for this purpose. The goal is to augment the lighting in the space, especially for darker rooms.

• Shoot from waist level. When you’re shooting an interior space and from a standing position, you will look down on most of the interior scenes. For interiors, you have to shoot from waist level in order to emphasize the décor and the furniture in the space. A trusty tripod will also come in handy for a steady perspective.

• Compose properly. Shooting interior is quite different when you have a model to work with. Since real estate photography usually features decors or space. It is important that you frame and compose your shot accordingly. Don’t be afraid to move stuff around and remove elements that are distracting.

• Opt for the right aperture. Shoot with the correct aperture in order to keep everything in focus. Although stopping down smaller than a camera’s maximum aperture size is great if your goal is to get bokeh, this is not ideal for most real estate shots. It is important to go for larger f-numbers, around f/8 or higher to keep more of the room in focus.

• Create your own editing presets. There will be projects where you’ll be pressed for time. Having your own presets for editing will save you time and let you create your own style of editing. A process in place will allow you to shorten editing time so you can send your outputs right away.

• Quick turnaround. The real estate industry is usually fast-paced. Along with having your own editing presets, make sure that you deliver your images on time if not earlier. The faster you can deliver, the better. This ensures that you get good reviews from the harried real estate agents tath will undoubtedly comprise your client list.


Source of inspiration (random order):

  • A Beginner’s Guide to Aperture and Depth of Field – link
  • 13 Real Estate Photography Tips and Mistake – link
  • Real Estate Photography – a Guide to Getting Started – link
  • Real Estate Photography – 25 Tips From The Pros – link
  • 9 Awful Real Estate Listing Photos—And How To Avoid Taking Them – link
  • 10 Tips for Consistently Great Real Estate Photography – link
Complete Solution

Ready to work with us?

Send us your photos and let our expert real estate photo editors handle the editing — fast, accurate, and ready for publishing.

Contact Sales