Phixer
PortfolioAbout Us
Tutorials

Learn how to get the most out of Phixer's editing services.

Blog

Tips, trends, and insights for real estate marketing success.

FAQ

Quick answers to common questions about our services.

Latest Tutorial & Blog

Introduction for Real Estate Photography

Introduction for Real Estate Photography

Hi my name is Alex and I will be taking you through a photographer training tutorial where you learn the principles and techniques of real estate photography. Make sure you have your camera and tripod on hand so you can change settings accordingly and experiment with some of the techniques intermittently as we go through different processes and ideas.<br/><br/><h2>Before we get started on the photography side of the job, we need to do a basic overview of best practices once you arrive at a property.</h2><br/>Firstly, it's important to remember that though there are formulas and rules of real estate photography that you'll be thinking about every shoot, every agent and broker has different preferences and goals, depending on their taste and the distinctive characteristics of the listing. Therefore after you've met the agent and gone through baseline introductions, ask them to give you a tour of the property so they can voice any specific shot ideas,angles are elements of the property they especially want to capture.<br/><br/>This will give you a good sense of their marketing goal and the layout of the house so you can mentally prepare for the forthcoming shoot. Don't hesitate to respectfully raise concerns if agent has a poor shot idea that you know won't work. In these situations you may want to take the shot and show them it's a bad idea rather than trying to describe why. Nonetheless, the ultimate goal is to give the agent what they want, so be compliant and experiment with bizarre ideas if necessary.<br/><br/>Sometimes you may even be surprised. After you've gotten a tour from the agent, start prepping the house for photos. This means turning on all light fixtures and lamps, pulling up blinds and hiding remote controls, Kleenex boxes, sponges and any other items inside that will show poorly in photos and make it difficult on your <a href="https://www.phixer.net/">real estate image retouching company</a>. For staged houses, you probably won't have to move anything out of the way but in properties where the homeowners are still living there, you may have to hide some personal items and declutter a bit. Remember you have a limited amount of time to finish the shoot, so if the house is overly cluttered or unprepared for shooting, ask the agent whether you should reschedule or if they're comfortable shooting the property in its present condition. There's only so much you can do and you're a photographer not a home cleaner/stager.<br/><br/><h2>Do not spend more than 15 minutes prepping the property.</h2><br/>Do what you can within that limit, however moving heavy furniture, decluttering every room, sweeping etc are not your responsibilities. If you have time, avoid including the following items in your shots; bath mats, small carpets or mats on the kitchen floor, modems and bundles of cords, the homeowner's personal photos, toothbrushes, shampoo bottles and personal toiletries in general, trash cans, bedside alarm clocks, home phones, dog beds, litter boxes and anything else that will negatively affect the marketability of the listing. Usually these items can be gently move to the outside of the frame of the photo, then returned once you finish capturing the space. A note on blinds, in general all window blinds should be pulled up there are few exceptions to this rule, so leave the blinds up if;<br/><br/>A. The view outside is really unpleasant, for example there's a dumpster and industrial refinery, a chaotic construction site or anything else that would devalue the listing.<br/><br/>B. If the agent and insists for whatever reason, on leaving them down, you are after all working for them.<br/><br/>And lastly:<br/><br/>C. If the blinds are broken and won't stay level or pull up entirely. Sometimes excessively heavy blinds can be problematic and it's best not to risk pulling them off the wall. Leave the blinds down and twist them open so light can come through the windows. Other notes on prepping the house; make sure you remove security signs from the front yard before taking exterior shots, also hoses should be either coiled or removed from view.<br/><br/>Garage doors should be closed and garbage cans either moved into the garage or out of view. In kitchen's especially, make sure you double check for cabinet under lighting and turn the stove lights on. Dining room and breakfast table chairs should be tucked in even and orderly. Fans, fireplaces, TVs in any other kinetic features of the listing should be turned off. These objects will appear blurry and disorienting once the disparate exposures are fused by your real estate photo retoucher into an HDR composite.

Read More ↗

What's New?

AI Real Estate Photo Editing

AIPhixer AIReal Estate Photo Editing

Instant, professional-quality edits powered by AI technology—perfect for tight deadlines.

Read More ↗
Photo Editing

Professional editing that makes properties shine.

Declutter

Remove unwanted objects for clean, distraction-free images.

Video Editing

Cinematic property tours that captivate and convert buyers.

Virtual Twilight

Convert daytime shots into dramatic dusk photography.

Virtual Staging

Add designer furniture to showcase a property's full potential.

AI Editing New

Lightning-fast edits powered by advanced AI technology.

Lawn Replacement

Transform dull lawns into lush, vibrant green instantly.

AI Website Builder

Build stunning listing websites in minutes, no coding needed.

LoginTalk to an expert
Phixer

© 2026 Phixer, Inc. All Rights Reserved

Trusted editing partner for real estate professionals since 2009.

Expert editors, proven quality, 24/7 support.

+1 206-934-1858

155 NE 100th St., #309, Seattle WA 98125

support@phixer.net

Community

  • About Us
  • Portfolio
  • Tutorials
  • Blog
  • FAQ

Services

  • Photo Editing
  • Video Editing
  • Virtual Staging
  • Lawn Replacement
  • Declutter
  • Virtual Twilight
  • AI Editing
  • Website Builder

Legal

  • Privacy Policy
  • Terms of Use

5 Ground Rules for Effective Virtual Staging

July 27, 2020

5 Ground Rules for Effective Virtual Staging
Real Estate Photo Editing

July 27, 2020

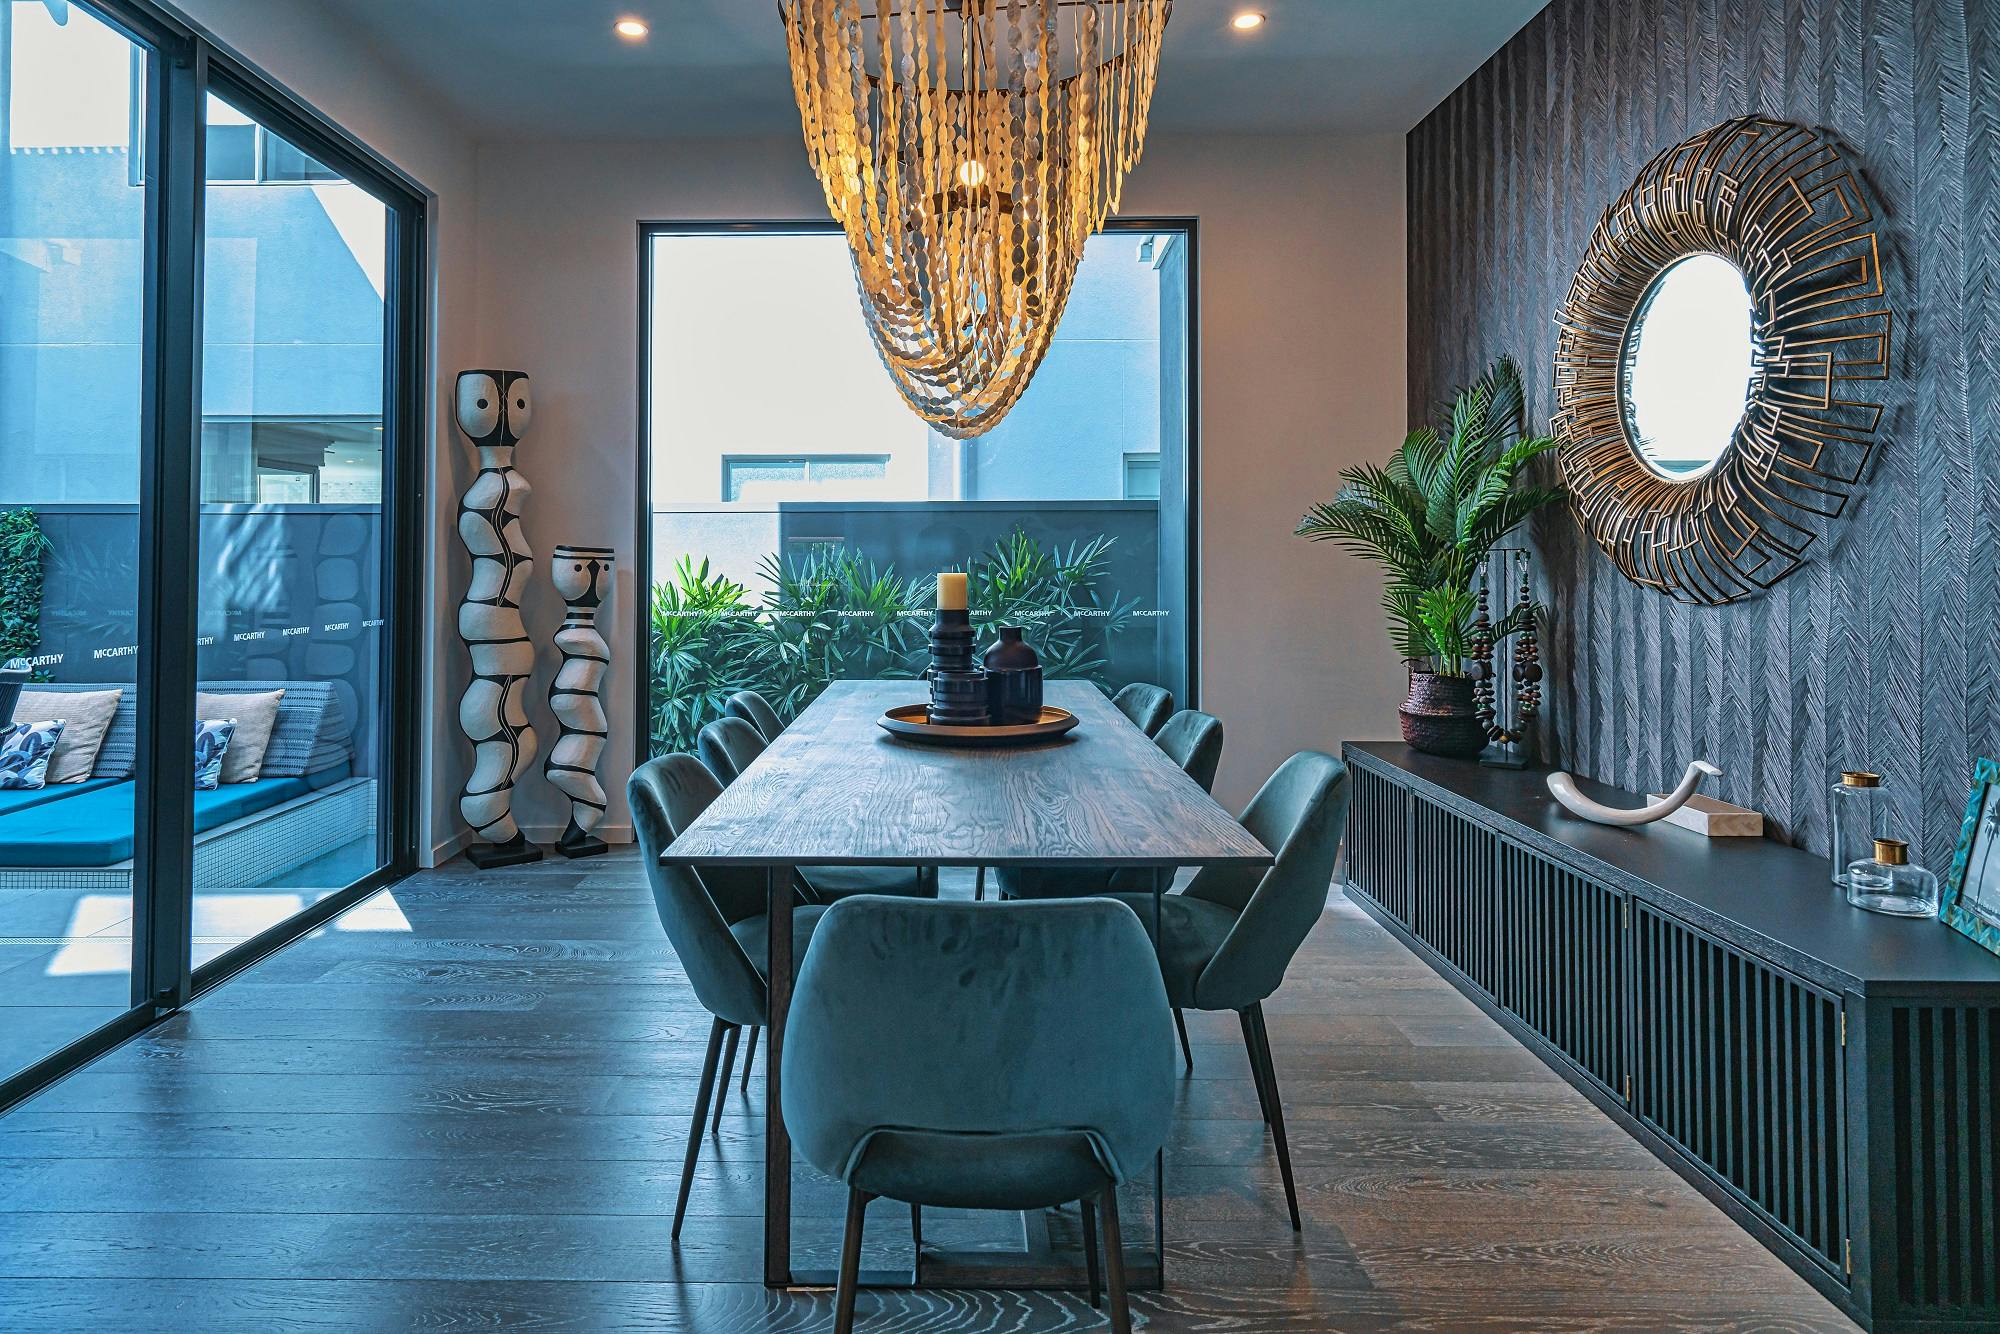
With the power of virtual staging, anyone can transform an empty room into something grand and beautiful. We know that it is an excellent way to produce fast and secure real estate images appealing to potential buyers.

Moreover, it is now considered another useful technique used by real estate photo retouching companies to save time and cost, rather than opting to do a traditional home staging. In the usual virtual staging process, the real estate photo editor adds virtually designed furniture and appliances in a vacant interior space. Then, accents are added to add aesthetics to the images.  As a real estate photo retouching company, adding virtual staging to your services can make your business the go-to platform for your clients’ real estate marketing needs.

A realtor in Denver needed multiple versions of the same listing for family, coworker, flatmate, and bachelor styles. By following rules #1 (client preferences) and #3 (theme consistency), Phixer delivered three authentic stagings in 48 hours, each targeting a different demographic.

phixer virtual staging

Basic Virtual Staging Rules to Keep in Mind

Given the virtual staging technique’s endless possibilities, anyone can go overboard with the graphic designs to use and other effects. We know that this is unacceptable regardless of whether it is the client’s instruction or purely the real estate photo editor’s intuition.

Here are the five basic but essential virtual staging rules that you must incorporate in every project you get from a realtor or the client.

1. Knowing Your Client’s Interests and Preferences

In virtual staging, it is necessary to know your clients’ likes and dislikes regarding virtual furniture and appliances to use. You can try to ask them about the kind of furniture designs they want to have in the virtual room. Then, you can also inquire if they are interested in getting a catalog first of all the virtual furniture and appliances available to make a list and give it to you in advance. It may sound like a hassle on your part, but as the provider, you need to exert this kind of effort to make sure that your customer is happy and satisfied.

2. Always Choose a Reasonable and Realistic Design

To make virtual home staging looks realistic, the perfect blending of computer-aided design (CAD) is essential. Without the ideal knowledge to do this, the output images will never look realistic and professionally-made.

Other elements to consider when doing virtually-staged real estate images such as the lighting and shadows. This is especially needed once all the furniture is put in place on the image.

For example, an interior shot of the living room with an overlooking view of nature through a large window, you should anticipate that there are sunlight beams that can enter the room through the window. Hence, it would be best if you considered the proper placement of the other furniture in the picture that, somehow, can block the sunlight.

Moreover, even the simple details of mirrors and reflections should be visible in the real estate images. A typical example is if you have a sofa and a mirror on the room, the sofa’s reflection should be seen in the mirror to make it look more realistic.

See? If you do this kind of simple checking on the image’s details, it can make the photos look more useful and appealing. It also gives your clients the impression that you can create good listing images to offer to your clients.

3. Match the Furnishings and the Room’s Theme

The interior design’s basic principle is only to use furniture that can go well with the room’s design. It is a rule of thumb. From the appliances, furniture, and decors, everything must match the physical space.

When we say home style, it means the overall theme of the house. Does it have a contemporary design? Or, is it more modern or classic? Still, if you are unsure about the type of furniture to use, you can check some magazines and websites to get some ideas.

4. Limit the Decorations

The basic principle in decorating a room is not to overdo it. Keep it minimal and avoid being too flashy. It is still best to remain minimalistic in your design. Please resist the temptation to put virtual furnishings in every square inch of space because it can make the area look stuffy.

5. Minimize Personal Touches

Sometimes, it is also important to note that even if branding is essential, adding a touch of personal branding is not that always appealing. If possible, focus on the client’s requirements and avoid adding unnecessary details.

Frequently Asked Questions

Will I be able to customize after staging?

Yes, you can request adjustments—Phixer offers at least two rounds of revisions included.

How do you ensure staging looks realistic?

We match lighting, shadows, scale, reflections, and furnishings to real-world physics.

Complete Solution

Ready to work with us?

Send us your photos and let our expert real estate photo editors handle the editing — fast, accurate, and ready for publishing.

Talk to an expert