Phixer
PortfolioAbout Us
Tutorials

Learn how to get the most out of Phixer's editing services.

Blog

Tips, trends, and insights for real estate marketing success.

FAQ

Quick answers to common questions about our services.

Latest Tutorial & Blog

Introduction for Real Estate Photography

Introduction for Real Estate Photography

Hi my name is Alex and I will be taking you through a photographer training tutorial where you learn the principles and techniques of real estate photography. Make sure you have your camera and tripod on hand so you can change settings accordingly and experiment with some of the techniques intermittently as we go through different processes and ideas.<br/><br/><h2>Before we get started on the photography side of the job, we need to do a basic overview of best practices once you arrive at a property.</h2><br/>Firstly, it's important to remember that though there are formulas and rules of real estate photography that you'll be thinking about every shoot, every agent and broker has different preferences and goals, depending on their taste and the distinctive characteristics of the listing. Therefore after you've met the agent and gone through baseline introductions, ask them to give you a tour of the property so they can voice any specific shot ideas,angles are elements of the property they especially want to capture.<br/><br/>This will give you a good sense of their marketing goal and the layout of the house so you can mentally prepare for the forthcoming shoot. Don't hesitate to respectfully raise concerns if agent has a poor shot idea that you know won't work. In these situations you may want to take the shot and show them it's a bad idea rather than trying to describe why. Nonetheless, the ultimate goal is to give the agent what they want, so be compliant and experiment with bizarre ideas if necessary.<br/><br/>Sometimes you may even be surprised. After you've gotten a tour from the agent, start prepping the house for photos. This means turning on all light fixtures and lamps, pulling up blinds and hiding remote controls, Kleenex boxes, sponges and any other items inside that will show poorly in photos and make it difficult on your <a href="https://www.phixer.net/">real estate image retouching company</a>. For staged houses, you probably won't have to move anything out of the way but in properties where the homeowners are still living there, you may have to hide some personal items and declutter a bit. Remember you have a limited amount of time to finish the shoot, so if the house is overly cluttered or unprepared for shooting, ask the agent whether you should reschedule or if they're comfortable shooting the property in its present condition. There's only so much you can do and you're a photographer not a home cleaner/stager.<br/><br/><h2>Do not spend more than 15 minutes prepping the property.</h2><br/>Do what you can within that limit, however moving heavy furniture, decluttering every room, sweeping etc are not your responsibilities. If you have time, avoid including the following items in your shots; bath mats, small carpets or mats on the kitchen floor, modems and bundles of cords, the homeowner's personal photos, toothbrushes, shampoo bottles and personal toiletries in general, trash cans, bedside alarm clocks, home phones, dog beds, litter boxes and anything else that will negatively affect the marketability of the listing. Usually these items can be gently move to the outside of the frame of the photo, then returned once you finish capturing the space. A note on blinds, in general all window blinds should be pulled up there are few exceptions to this rule, so leave the blinds up if;<br/><br/>A. The view outside is really unpleasant, for example there's a dumpster and industrial refinery, a chaotic construction site or anything else that would devalue the listing.<br/><br/>B. If the agent and insists for whatever reason, on leaving them down, you are after all working for them.<br/><br/>And lastly:<br/><br/>C. If the blinds are broken and won't stay level or pull up entirely. Sometimes excessively heavy blinds can be problematic and it's best not to risk pulling them off the wall. Leave the blinds down and twist them open so light can come through the windows. Other notes on prepping the house; make sure you remove security signs from the front yard before taking exterior shots, also hoses should be either coiled or removed from view.<br/><br/>Garage doors should be closed and garbage cans either moved into the garage or out of view. In kitchen's especially, make sure you double check for cabinet under lighting and turn the stove lights on. Dining room and breakfast table chairs should be tucked in even and orderly. Fans, fireplaces, TVs in any other kinetic features of the listing should be turned off. These objects will appear blurry and disorienting once the disparate exposures are fused by your real estate photo retoucher into an HDR composite.

Read More ↗

What's New?

AI Real Estate Photo Editing

AIPhixer AIReal Estate Photo Editing

Instant, professional-quality edits powered by AI technology—perfect for tight deadlines.

Read More ↗
Photo Editing

Professional editing that makes properties shine.

Declutter

Remove unwanted objects for clean, distraction-free images.

Video Editing

Cinematic property tours that captivate and convert buyers.

Virtual Twilight

Convert daytime shots into dramatic dusk photography.

Virtual Staging

Add designer furniture to showcase a property's full potential.

AI Editing New

Lightning-fast edits powered by advanced AI technology.

Lawn Replacement

Transform dull lawns into lush, vibrant green instantly.

AI Website Builder

Build stunning listing websites in minutes, no coding needed.

LoginGet in touch
Phixer

© 2026 Phixer, Inc. All Rights Reserved

Trusted editing partner for real estate professionals since 2009.

Expert editors, proven quality, 24/7 support.

+1 206-934-1858

155 NE 100th St., #309, Seattle WA 98125

support@phixer.net

Community

  • About Us
  • Portfolio
  • Tutorials
  • Blog
  • FAQ

Services

  • Photo Editing
  • Video Editing
  • Virtual Staging
  • Lawn Replacement
  • Declutter
  • Virtual Twilight
  • AI Editing
  • Website Builder

Legal

  • Privacy Policy
  • Terms of Use

5 Innovative Virtual Staging Ideas for Interior Design

September 15, 2020

5 Innovative Virtual Staging Ideas for Interior Design
Real Estate Photo Editing

September 15, 2020

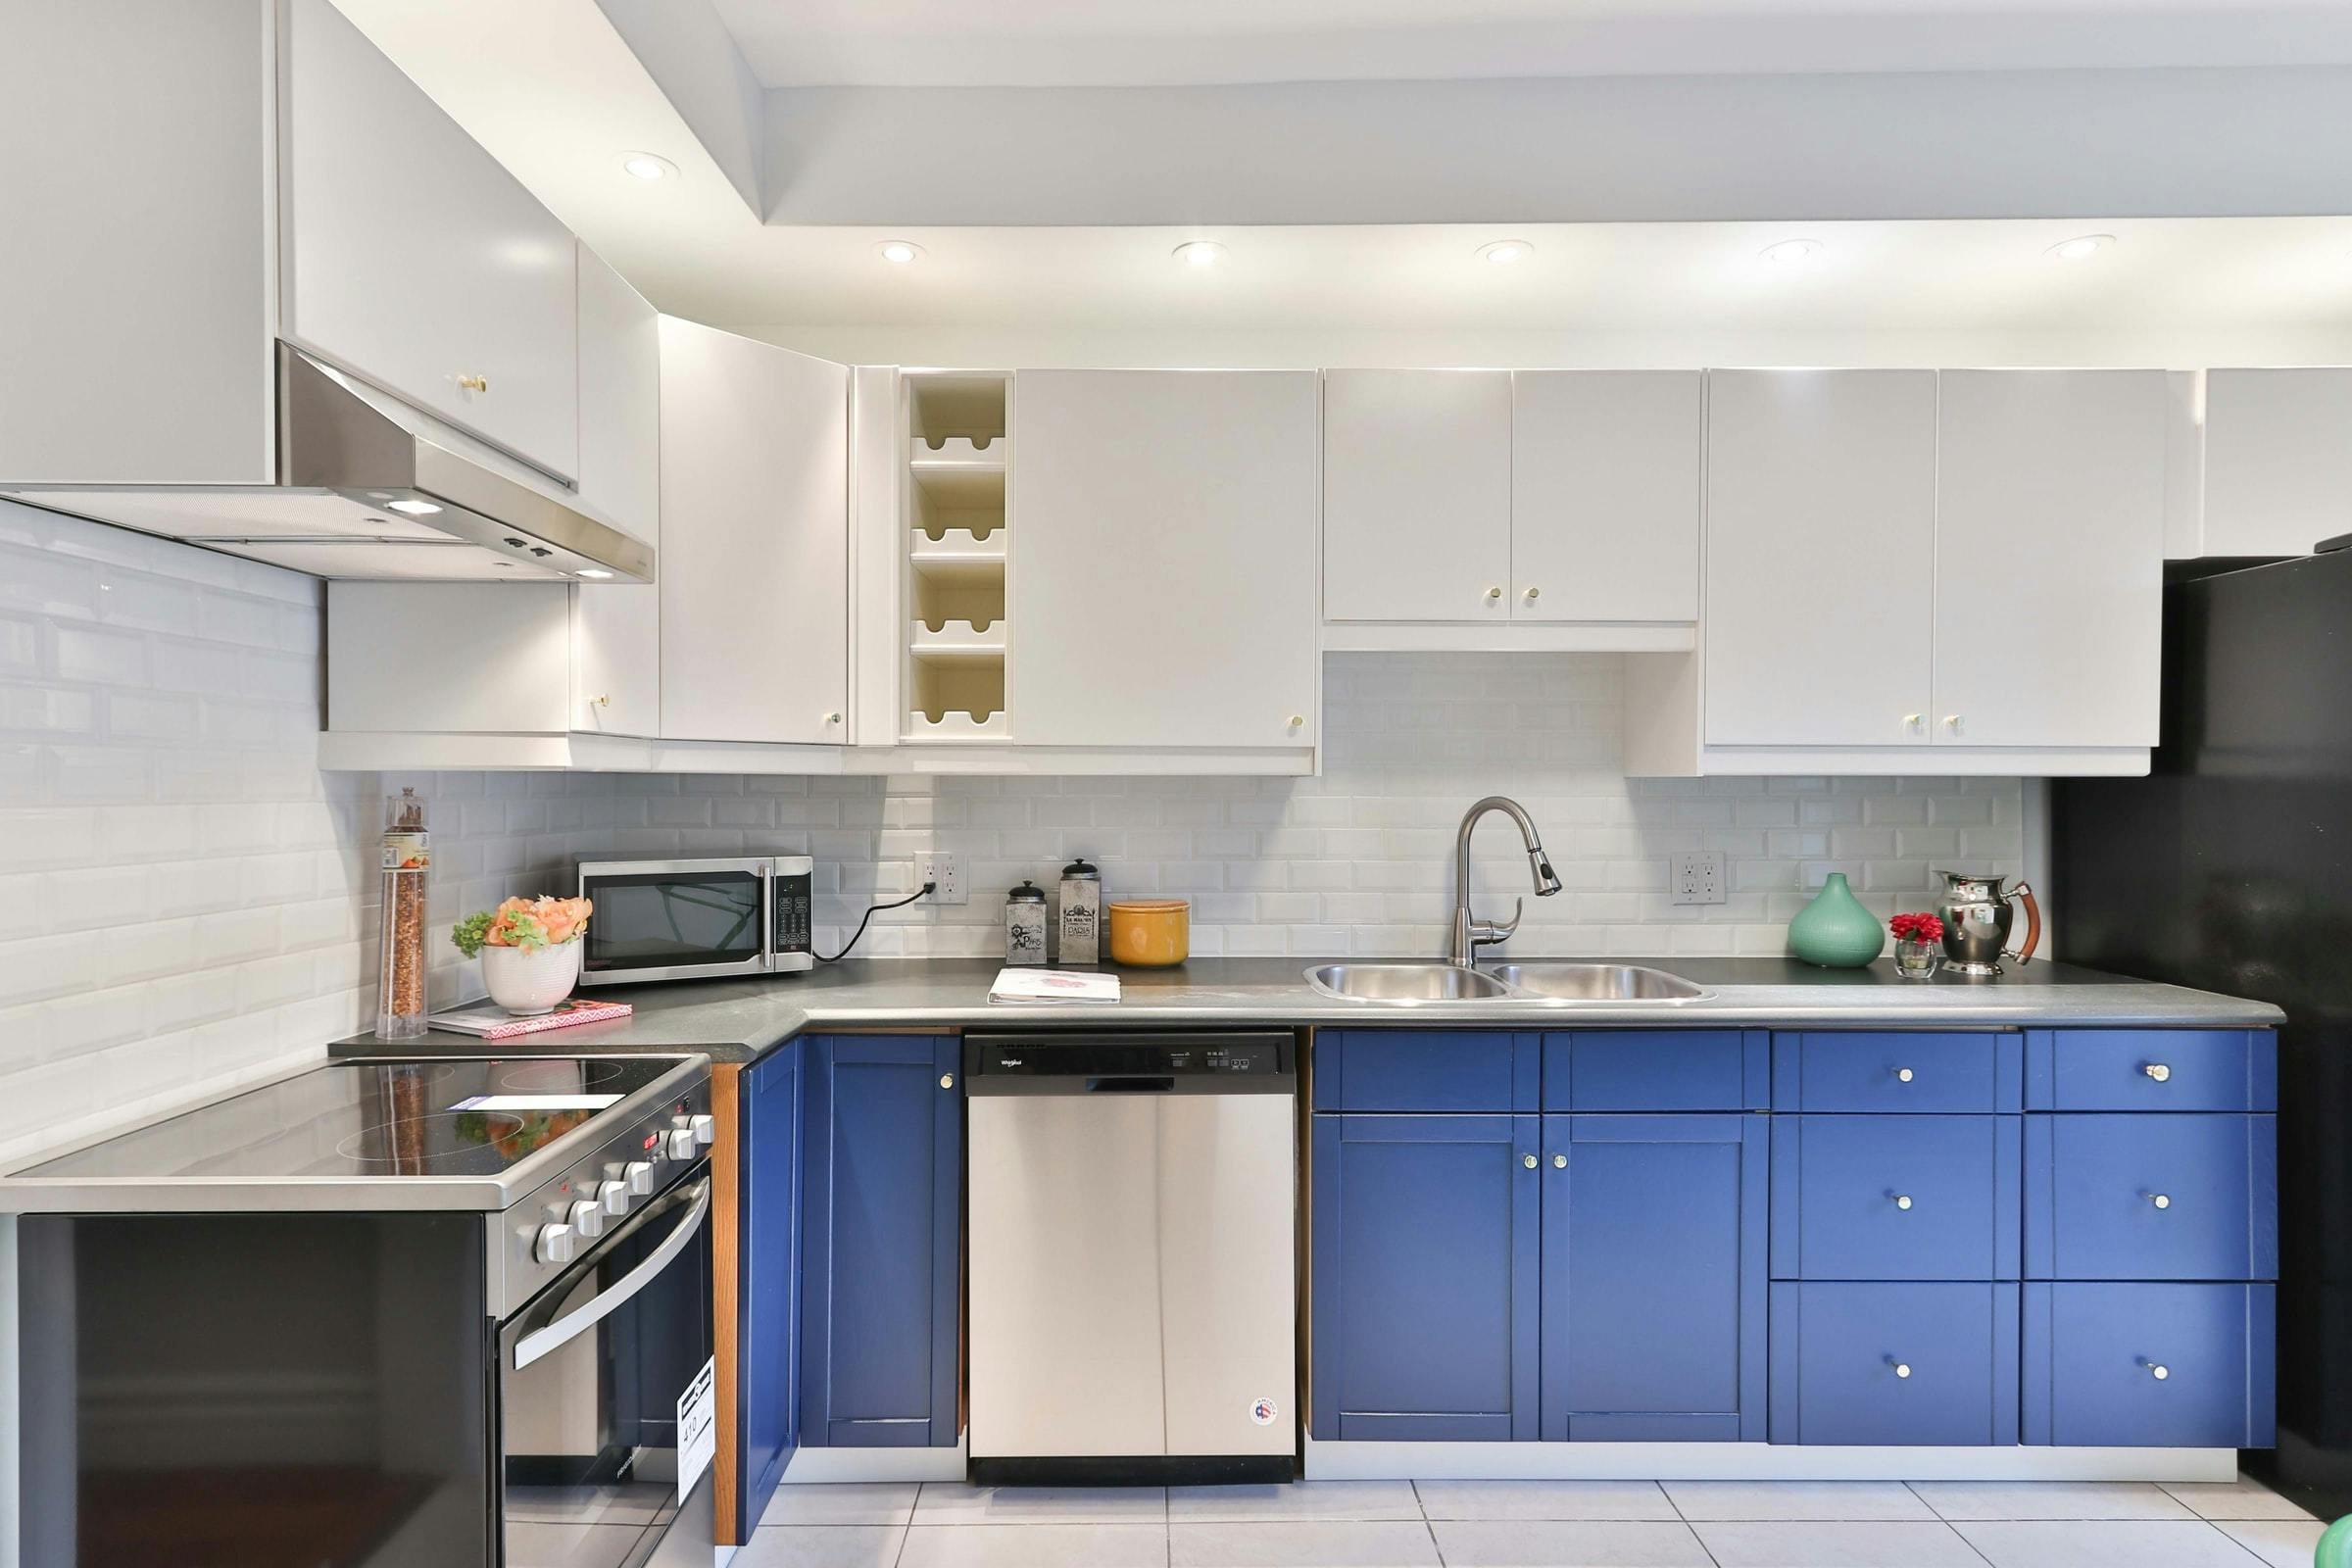
Doing interior photography involves staging methods – either traditional or virtual. Regardless of the client’s choice, most photographers and real estate photo editors need ample time to check out the property and talk to the interior designer, primarily if the place will be staged using virtual home staging.

Unlike the traditional home staging setup, virtual staging needs thorough planning, especially on the editing part since this is the time where real estate photo editors insert the staging process. This means that as the editor, you should already know some of the virtual staging basics.

Virtual staging involves using computer software to alter a photograph. Most of the time, it is used in real estate images (both exterior and interior) to fill the empty spaces with appropriate furniture and fixtures.

Doing this helps clients save money and time compared to using the traditional staging method wherein real furniture is needed. This technique is proven to be a useful marketing tool, especially for those buyers who prefer online transactions. It allows them to see a realistic vision of what the room will look like furnished.

In a renovated 1920s bungalow, Phixer applied a Scandinavian-themed virtual staging—white-washed woods, warm textiles, plants—leading to a 20% increase in click-throughs compared to prior listing photos.

Here’s how Phixer’s virtual staging process for interior design works: Clients select 1–2 themes. Designers integrate furniture, color palettes, and accessories consistent with that style. The result: cohesive, stylish rooms that align with buyer expectations.

Here are five creative ideas to help you (both photographers and editors) if you are up for an interior design photo shoot that involves virtual staging.

Learn the basics

Simplified, it means making sure the room is empty, clean, and well-lit before taking any shots. There must be teamwork between the photographer and the editor to yield high-quality interior images. Having excellent photographs gives the virtual staging artists more time to edit the pictures without fixing many elements of the original photos.

Create a striking balance

Once you start editing the photos, establish a balanced design that incorporates both clean and inviting vibes. For example, most modern interior design features minimalistic aesthetics. While this can be an excellent idea for a clean, straightforward look, bear in mind that some buyers prefer a more inviting feel to the overall ambiance. They may have furniture and some possessions that need visualization, which should be one of the things you should consider.

Determine the focal point to catch everyone’s attention

Make sure to put a piece of furniture or leave a single area striking enough to catch the attention of anyone who walks in. For example, you can put a fireplace, a great window, or a beautiful couch in the room that stands out and stays noticeable right away.

Use natural lighting

One key to great virtually-staged images is the proper use of lighting. Most of the time, natural lighting is the most common way to achieve perfect pictures. Yet, using studio lighting is acceptable, especially if natural lighting is unavailable.

Use a neutral background

Setting a neutral color foundation creates an emotional tone. Using this hue for the environment is perfect as it blends with other color highlights within the room. Moreover, it sets a calm and inviting tone to each room that you stage. The neutral palette stands out when you use splashes of color. In return, it excites and enthuses prospective buyers. For example, you can add the accents on the cushions, rugs, flowers, or paintings. The eyes easily distinguish these things inside the room, so it gives buyers a different perspective when it comes to color matching.

In the end, there are endless when it comes to virtual staging, and the best photographers can take great shots while the skilled editors can turn the ordinary room shots into something that looks like the one in magazines. Remember to incorporate these staging ideas in your next interior design shoot to achieve those professional images.

Frequently Asked Questions

Can virtual staging reflect different interior design styles?

Absolutely. Virtual staging can simulate modern, rustic, mid-century, minimalist, or industrial styles—customized by audience taste.

Will virtual staging show accurately in print brochures?

Yes, the same staged images work perfectly for digital listings and printed marketing materials.

Complete Solution

Ready to work with us?

Send us your photos and let our expert real estate photo editors handle the editing — fast, accurate, and ready for publishing.

Contact Sales