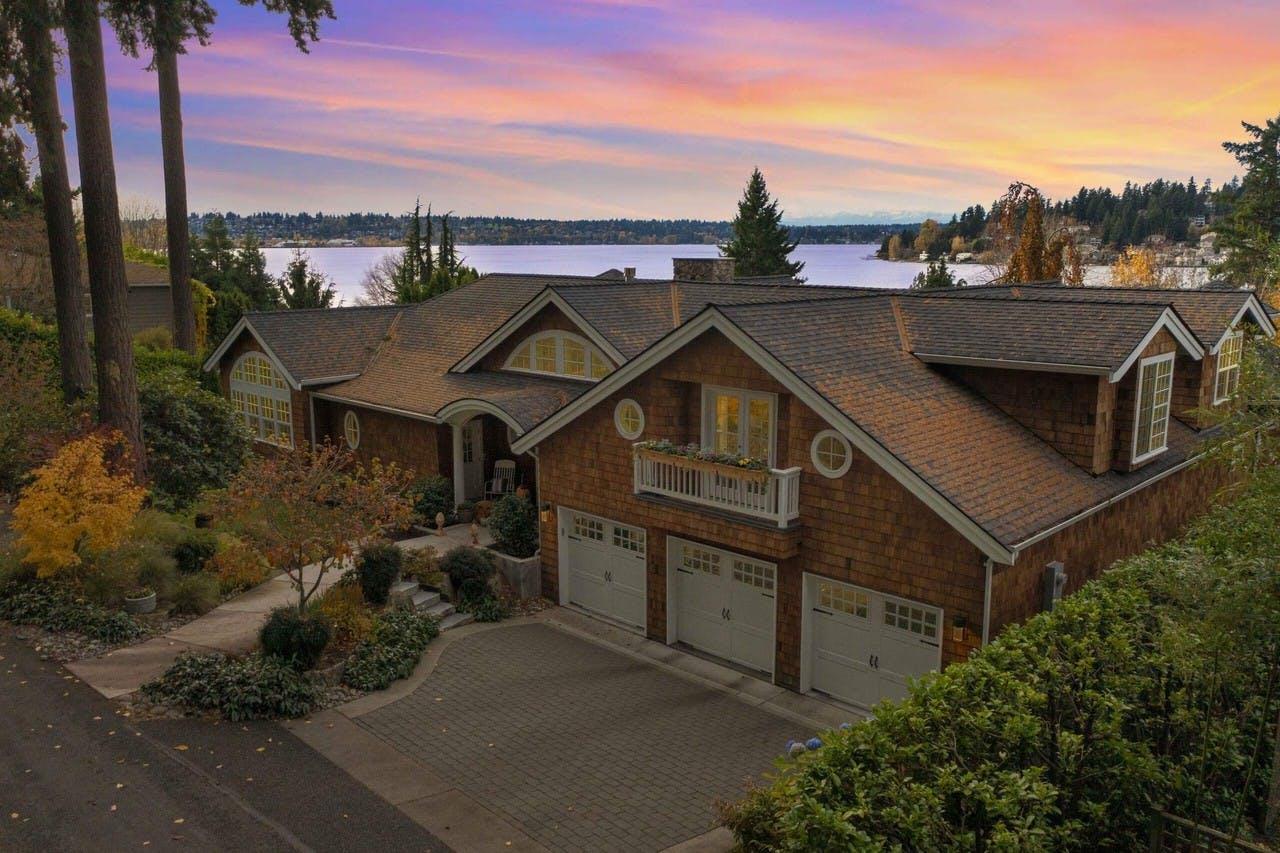
Real estate listings are highly competitive. The best real estate photos should have a combination of external and internal factors. Remember that the ambiance and overall property appeal can significantly affect a homebuyer’s decision.
If you’re hiring real estate photo editing services or editing photos on your own, it’s essential to apply the rules of virtual twilight editing in your photos. This technique will make the images more appealing to the naked eye as exterior photos look best during sunset.
Here are some of the tips you can follow:
1. Decide on an Overall Look
Planning is the first step to creating a beautiful virtual twilight real estate photo, especially since there are specific conditions for optimal image processing. If you shot around 20 photos of the property’s exteriors, pick approximately 10 or 12, make lens correction adjustments and cull the images you want to edit.
2. Separate the Image as Layers
Once you have imported images on Photoshop, pick an ambient image as your bottom layer. If you haven’t shot an ambient image, you can use a flash image that doesn’t cast shadows or lights on the central part of the house.
Here are the steps in separating the layers of the image:
- Turn off visibility on all layers except your base layer.
- Turn on your second layer, and then add a black mask.
- Don’t forget to change your blend mode into “lighten” to reveal lighter pixels from the top layer.
3. Edit the Image
You can treat the image after organizing the layers. Remember that you’re only enhancing the scene with a crisp light in this step, so don’t go overboard.
Take your brush and then make the following changes:
- Change your color to white;
- Set your flow to 8%;
- Set your hardness between 0-20%;
- Brush around the areas where light is painted with flash.
4. Flatten the Image
Next, you need to flatten the image to have a cleaner and clearer selection for the sky replacement. To do this, highlight all the layers you’re working on, right-click and then select flatten image. You should already see some improvements in your photo.
5. Add Your New Sky
You need to select a high-quality and realistic-looking sky on the internet for this part. Don’t go overboard when choosing your new atmosphere. Remember, the focus on the photo should still be the exterior of the property, not the virtual twilight sky.
Once you’ve selected your new sky, copy your sky layer into your layer pallet. Make sure that the padlock on your base layer is unchecked, and then drag your sky layer below it.
6. Select and Mask Your Sky
Select the “quick selection” tool and select your sky. Once done, choose the “select and mask” button on the toolbar and click the “refine edge” tool. After, make the following setting to the photo you’re editing:
- Contrast: 25%
- Feather: 2.1px
- Output to: Layer mask
- Radius: 3px
- Shift Edge: -5%
- Smart Radius unchecked
- Smooth: 2
With the “refine edge” tool, work on improving the mask edge. You can do this by placing the brush on the body of the image and then brush toward the sky. This action will enable you to select everything on the picture except the sky.
Click on “ok” to apply the mask to a new layer of mask. The selection will be an inverted mask, but you can quickly reverse the section by pressing Ctrl/Cmd + i. Your photo should look pretty good at this point, but you’ll need to clean it.
Move your sky layer strategically on your photo to see the best part of the sky. You can do this by clicking on the sky layer and using the move tool.
Once you’re satisfied with how the sky appears in the photo, flatten the image again. Save the image and import it again to Lightroom.
7. Make Final Adjustments
Adjust the contrast, exposure, saturation, and verticals once you import the photo in a post-processing program like Lightroom. The corrections you’ll make to your photo will usually depend on the angle you shot the image. Ensure that the sky doesn’t look too distinct or awkward by blurring or blending in the tones.
Practice Makes Perfect
Contrary to popular belief, virtual twilight editing is easy. As long as you’re willing to exert effort to learn how to use specific editing tools and spend time practicing, it won’t be long before you can master the day to dusk photo editing and create the most stunning virtual twilight in your photos.
