Phixer
PortfolioAbout Us
Tutorials

Learn how to get the most out of Phixer's editing services.

Blog

Tips, trends, and insights for real estate marketing success.

FAQ

Quick answers to common questions about our services.

Latest Tutorial & Blog

Introduction for Real Estate Photography

Introduction for Real Estate Photography

Hi my name is Alex and I will be taking you through a photographer training tutorial where you learn the principles and techniques of real estate photography. Make sure you have your camera and tripod on hand so you can change settings accordingly and experiment with some of the techniques intermittently as we go through different processes and ideas.<br/><br/><h2>Before we get started on the photography side of the job, we need to do a basic overview of best practices once you arrive at a property.</h2><br/>Firstly, it's important to remember that though there are formulas and rules of real estate photography that you'll be thinking about every shoot, every agent and broker has different preferences and goals, depending on their taste and the distinctive characteristics of the listing. Therefore after you've met the agent and gone through baseline introductions, ask them to give you a tour of the property so they can voice any specific shot ideas,angles are elements of the property they especially want to capture.<br/><br/>This will give you a good sense of their marketing goal and the layout of the house so you can mentally prepare for the forthcoming shoot. Don't hesitate to respectfully raise concerns if agent has a poor shot idea that you know won't work. In these situations you may want to take the shot and show them it's a bad idea rather than trying to describe why. Nonetheless, the ultimate goal is to give the agent what they want, so be compliant and experiment with bizarre ideas if necessary.<br/><br/>Sometimes you may even be surprised. After you've gotten a tour from the agent, start prepping the house for photos. This means turning on all light fixtures and lamps, pulling up blinds and hiding remote controls, Kleenex boxes, sponges and any other items inside that will show poorly in photos and make it difficult on your <a href="https://www.phixer.net/">real estate image retouching company</a>. For staged houses, you probably won't have to move anything out of the way but in properties where the homeowners are still living there, you may have to hide some personal items and declutter a bit. Remember you have a limited amount of time to finish the shoot, so if the house is overly cluttered or unprepared for shooting, ask the agent whether you should reschedule or if they're comfortable shooting the property in its present condition. There's only so much you can do and you're a photographer not a home cleaner/stager.<br/><br/><h2>Do not spend more than 15 minutes prepping the property.</h2><br/>Do what you can within that limit, however moving heavy furniture, decluttering every room, sweeping etc are not your responsibilities. If you have time, avoid including the following items in your shots; bath mats, small carpets or mats on the kitchen floor, modems and bundles of cords, the homeowner's personal photos, toothbrushes, shampoo bottles and personal toiletries in general, trash cans, bedside alarm clocks, home phones, dog beds, litter boxes and anything else that will negatively affect the marketability of the listing. Usually these items can be gently move to the outside of the frame of the photo, then returned once you finish capturing the space. A note on blinds, in general all window blinds should be pulled up there are few exceptions to this rule, so leave the blinds up if;<br/><br/>A. The view outside is really unpleasant, for example there's a dumpster and industrial refinery, a chaotic construction site or anything else that would devalue the listing.<br/><br/>B. If the agent and insists for whatever reason, on leaving them down, you are after all working for them.<br/><br/>And lastly:<br/><br/>C. If the blinds are broken and won't stay level or pull up entirely. Sometimes excessively heavy blinds can be problematic and it's best not to risk pulling them off the wall. Leave the blinds down and twist them open so light can come through the windows. Other notes on prepping the house; make sure you remove security signs from the front yard before taking exterior shots, also hoses should be either coiled or removed from view.<br/><br/>Garage doors should be closed and garbage cans either moved into the garage or out of view. In kitchen's especially, make sure you double check for cabinet under lighting and turn the stove lights on. Dining room and breakfast table chairs should be tucked in even and orderly. Fans, fireplaces, TVs in any other kinetic features of the listing should be turned off. These objects will appear blurry and disorienting once the disparate exposures are fused by your real estate photo retoucher into an HDR composite.

Read More ↗

What's New?

AI Real Estate Photo Editing

AIPhixer AIReal Estate Photo Editing

Instant, professional-quality edits powered by AI technology—perfect for tight deadlines.

Read More ↗
Photo Editing

Professional editing that makes properties shine.

Declutter

Remove unwanted objects for clean, distraction-free images.

Video Editing

Cinematic property tours that captivate and convert buyers.

Virtual Twilight

Convert daytime shots into dramatic dusk photography.

Virtual Staging

Add designer furniture to showcase a property's full potential.

AI Editing New

Lightning-fast edits powered by advanced AI technology.

Lawn Replacement

Transform dull lawns into lush, vibrant green instantly.

AI Website Builder

Build stunning listing websites in minutes, no coding needed.

LoginGet in touch
Phixer

© 2026 Phixer, Inc. All Rights Reserved

Trusted editing partner for real estate professionals since 2009.

Expert editors, proven quality, 24/7 support.

+1 206-934-1858

155 NE 100th St., #309, Seattle WA 98125

support@phixer.net

Community

  • About Us
  • Portfolio
  • Tutorials
  • Blog
  • FAQ

Services

  • Photo Editing
  • Video Editing
  • Virtual Staging
  • Lawn Replacement
  • Declutter
  • Virtual Twilight
  • AI Editing
  • Website Builder

Legal

  • Privacy Policy
  • Terms of Use

JPEG and PNG, GIF, BMP, TIFF, RAW Formats Explained

April 30, 2019

JPEG and PNG, GIF, BMP, TIFF, RAW Formats Explained
Photo Editing

April 30, 2019

[lwptoc]

Different Formats of Photos and Images

JPEG

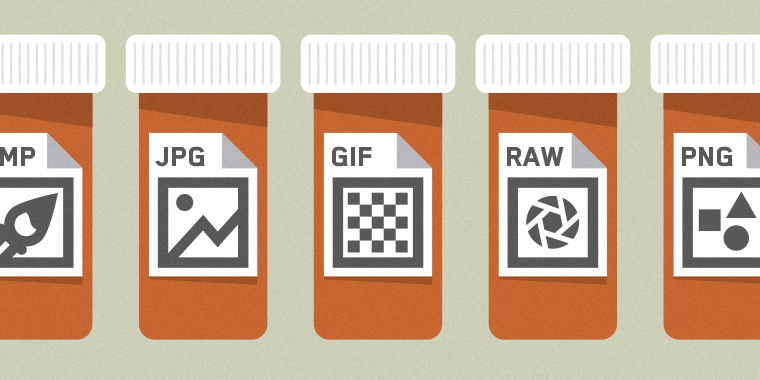
JPEG or Joint Photographic Experts Group is a file format for a digital image and is perhaps the most common format used for adjusting the image quality and file size. Using a JPEG format you can actually control the compression of the file. The more compressed the image is, the lower quality image and lower file size are, and vice versa. This format is often used in photos like painting and realistic images that have a variety of tone and color. It is the format used by the majority of digital cameras.

This format works by removing tiny details and things that the human eye cannot see. This is known as “lossy” compression. JPEG has some different types like Progressive JPEG which is a type that shows a low quality image and improves it over a short amount of time. This is commonly used for the internet to help the users that have a slow connection.

PNG

PNG or Portable Network Graphics file is a type of format used for photos and pictures that need a transparent background or animations. The transparent part does not need to be the background because you can make transparent almost everywhere in the picture.

Using this format can be useful especially when creating logos, Designing a website or even creating other images. Like GIF and TIFF, PNG is a raster format, so it represents an image as a two-dimensional array of colored dots (pixels).

GIF

GIF or Graphics Interchange Format is a digital file format developed in 1987 by CompuServe. GIF works by reducing the size of the images and some short animations. And because no data and information is lost, this format became popular.

As the time this file format was created, it supports 256 colors and during this time, it was considered by many as a breakthrough. The method used to keep file at a minimum size is a compression algorithm commonly used or referred to as LZW name after the inventors who made GIF, Abraham Lempel and Jacob Ziv of Israel and Terry Welch of the United States.

GIF was so popular back then but now it is used repeatedly over the internet to post videos and memes on websites such as Reddit, Tumblr, Pinterest and others.

BMP

BMP also known as bitmap image file and Device Independent Bitmap or simply Bitmap, is raster image format used to keep digital images. And the BMP file format is able to store two dimensional digital images, both monochrome and colored.

Since BMP format can support a wide range of colors and tones, it is used at photographs for shaded drawings and other detailed images. Detailed images usually are large but can be compressed so that the images can be detailed but not that hungry on storage. But if you want an image that is detailed, compression would be an option.

TIFF

TIFF or Tagged Image File Format is a computer file format that is a common format for exchanging raster graphic images between Programs. This format is mainly used by photographers and graphics artists because TIFF is supported by faxing, scanning and word processing.

An industry committee chaired by the Aldus developed the Tiff Format in 1986, which now is a part of the adobe software. Microsoft and Hewlett-Packard contributed to the making of this file format. TIFF is used mainly Desktop Publishing and 3-D apps and medical imaging applications.

Raw Format

So the term Raw is unprocessed, right? Well this type of Format is just as it said as “unprocessed”. Nothing but the picture that was taken and stored – meaning no data was lost or gained because what you took or shoot in the camera was the RAW format. Nothing was eventually compressed or stretched, nothing is modified.

The Raw Format remains at it is uncompressed and contains almost all the information from the CCD or CMOS, Then it can be adjusted and edited to be converted into either TIFF or JPEG and other file formats.

The Raw format is mainly considered as a single image file format AKA .raw. In addition, there are types of raw files that depend on the device that the picture was taken from like Adobe (.DNG), Canon (.CRW, .CR2), Casio (.RAW), Fuji (.RAF), Hasselblad (.3FR) etc.


Featured photo via https://community.articulate.com/

Complete Solution

Ready to work with us?

Send us your photos and let our expert real estate photo editors handle the editing — fast, accurate, and ready for publishing.

Contact Sales